Coding: A New Literacy

My students in grades K through 5 once again participated in the Hour of Code week, an effort by the non-profit Code.org to promote computer science in the classroom. We used various apps and websites to explore the basics of computer programming, including KodableHopscotch, Tynker (both web-based and the app version for iPad), and various tutorials from the code.org site (a favorite was the series of puzzles, Code With Anna and Elsa, which are based on Disney’s Frozen movie hit). It’s always great to watch the kids get excited and really into solving problems and creating animations. Read here about last year’s experience. Watch the video documenting this year’s fun and highlighting some of the skills learned.

Liquid Learning: Cool Word Vocabulary

Students are always eager to get hands-on training in how to use new tools. In this exercise, I was inspired by the “Cool Word Vocabulary” activity published by Tech4Learning to create an opportunity to use the company’s software, Pixie, with my 2nd grade students. I love using Pixie with my students (see, for example, biography research, how-to tutorials, and states research) as it allows them to be creative while also exploring the features of a great digital tool.

Using an organizer, students each chose a word from their current spelling lists and wrote a sentence or two using the word in context.

TemplateCoolWords1

In Pixie, students searched the copyright-friendly images available from Pics4Learning for images that represented the meaning of their chosen word. In some instances, this required them to think more broadly. For example, one student’s word was “stirrup”. Since there were no pictures of a stirrup, he had to think of other pictures that represent the meaning of the word and settled on “horse”.

IMG_2605

Before students began working in Pixie, I modeled the steps and showed them an example. I also gave them the step-by-step instructions in writing. Most students did very well working independently to create their cool word vocabulary words.

TemplateCoolWords2

As Pixie was new to this group, they really enjoyed playing with some of the software’s creative features, including the paint can tool. Some of the background students created were quite amazing. The finished products were exported as image (.jpeg) files. In sum, this exercise expanded both traditional and digital literacies. Liquid Literacy at work!  And we had fun.

Morgan's Cool Word

Lizas-Cool-Word

Noams-Cool-Word

Fostering Critical Thinking With State Research


14944259833_2eb862d7bd_z

My 4th grade students are studying Florida and its history in social studies class this year. Their teacher, Michelle Lewis, asked me to introduce them to digital resources related to the subject. Here in Florida, the Florida Electronic Library (funded by the State) makes available free to all its citizens a variety of electronic resources, including a Florida History database. After a brief introduction, I let the kids explore this resource via a scavenger hunt. They had so much fun with this that I decided to expand this project to a mini-research unit. Key elements of the mini-research unit are researching facts on two states, synthesizing information into a short written report, and creating a final digital report.

To facilitate the exercise I replicated the model report laid out in Liz Allen’s Research Without Copying presentation (2009)–a fabulous compilation of research presentation ideas, some of which are adapted from Nancy Polette’s book by the same title, challenging students to think critically about what they read and then synthesize the information learned in a variety of creative ways. Its a higher-level type of engagement with the material that ensures students better retain the information.

So on their next visit to the library, I introduced my students to the If…But Report. The idea was for them to research two different states, compile four facts for each state, and then compare and contrast the states in a one-page report, consisting of a written portion and a non-linguistic representation of the facts.

Research

The students scoured three pre-selected websites (kids.usa.gov, factmonster.com, and 50states.com) as well as the Kids InfoBits database for information. They were to find something interesting from each source and record the information on a graphic organizer.

GraphicOrganizerStatesResearch

Pre-Writing

Using a template, students drafted their reports. In a mini-lesson, we looked more closely at some student’s writing to discuss mainly style. For example, one student listed the state name in every sentence. Is this necessary? Is it interesting? Another student used big numbers to express the populations of his states. What would be a better way to tell the reader?

TemplateIfButReport

Report Creation

Using Pixie for iPad app students created their reports, which had to include a written portion as well as a non-linguistic representation of the facts gathered for each state. Even though I had originally planned three 40-minute sessions for this quick research and report project, it took five sessions. It was harder for some students than others to retrieve interesting facts from the sources. Also, the report writing was easier for some than others. All students, however, quickly created their reports using the Pixie app.

IMG_2412 IMG_2413

My students know that I expect quality work, so as a final step, they had to use a checklist. Those students who finished early, also had to write a brief reflection on their student blogs.

If...ButReportChecklist1

Here are some of the wonderful examples of the final product.

SaylorBy Saylor S.


image2-e1413909231942By Eliana M.


Liquid Learning: Using Subtext as a Digital Learning Enhancement

I was very fortunate to spend some valuable reading time every week during our third quarter with seven 5th grade students. Their language arts teacher, Andrea Hernandez, wanted to provide these students with a more personalized approach to close reading instruction. All seven students are excellent readers and we decided to challenge them with an unabridged classic, Around the World in 80 Days by Jules Verne. Since these students are in our pilot 1:1 iPad classroom and because I’ve been looking for a reason to give it a try, I decided to immerse our little group in a digital reading experience of this classic novel via Subtext for iPad app.

imgres

Subtext is a product of Renaissance Learning company (yes, of Accelerated Reader software fame), designed as a “collaborative ereading experience for K12 classrooms.” I chose to use the free, basic version of the app, which provided us with enough functionality. Alternatively, for a fee, users can upgrade to the premium features, offering access to CCSS-aligned assignments, text-to-speech option, and access to leveled nonfiction and informational texts. The only premium feature I would have liked to try out is the ability to track student progress. But since my group consisted of only seven students, it probably would not have made a difference. The basic version provided us with enough adequate functionality to upgrade our novel study to a new form of a social reading experience.

The app offers access to a large collection of ebooks, some for a fee and some are free. Since our classic is available in the public domain, we all downloaded a free version of Around the World in 80 Days directly into the app. I then created a “5th Grade Reading” group, inviting all seven members to join. Instructors have the ability to “enable student restrictions”, effectively preventing students from navigating the Web and sharing notes. I am not sure what the point of such restrictions is in an ereading environment, so opted to not turn them on.

IMG_0273

Mostly students read outside of our limited class time. To ensure students were reading more deeply and to assess understanding, I built discussion questions, multiple choice assessments, and polls directly into the text. These features allowed me to view and assess student responses prior to our next meeting in order to then focus on those parts of the text that needed clarification. As the teacher, I had the option to hide all responses until students submitted their answers.

Responses

Poll

MultipleChoice

Another value-added feature of Subtext is the ability to embed links to websites, images, or videos. To help build background knowledge, I linked to information about the author, the Suez canal, a map of the British colonies and another of colonial India, an image of a cow catcher mounted to the front of the old American locomotives, and more. Students also were able to embed links into their comments.

StudentWP

While reading, students highlighted words or entire passages and added notes. They then had the option to share the notes with the group. Simply tabbing a word pulled up a built-in dictionary, complete with audio pronunciation of the word and links to search both the Google search engine as well as Wikipedia.

StudentHighlights

The last feature we used is Subtext’s build-in link to Google Drive. Since our school uses Google Apps for Education, all our students have Gmail accounts and access to Google Drive. We shared a Google Doc of our schedule and this build-in link allowed us seamless access.

Would I use Subtext again? Yes! Using the app as a tool allowed students a different way of connecting with our text. Reading in groups is a social activity where students are learning with their peers. But using this digital tool elevated our small-group reading to a more inclusionary/participatory level by giving even those students who are usually not very vocal an equal voice. The lesson also demonstrates the power of liquid learning–most of the work was done outside of class. Also, the ability to build-in questions and to embed links facilitated active reading–although some students complained that the “the discussion questions…got in the way when there was a good part.” Most importantly, liquid resources like Subtext enable teachers to transcend the classroom and even school boundaries. Spending time together with a good book can include students across the room or literally across the world!

Interactive, Visual Student Reports

According to Wikipedia, visual literacy is

the ability to interpret, negotiate, and make meaning from information presented in the form of an image, extending the meaning of literacy, which commonly signifies interpretation of a written or printed text. Visual literacy is based on the idea that pictures can be “read” and that meaning can be communicated through a process of reading.

In today’s digital information economy, visual media and visual literacy are more important than ever. Developing the skills necessary to successfully negotiate the digital information universe, however, can be a challenging task. While anyone can create and share visual media, from basic image sharing via Facebook or FlickR to curation sites that rely on images such as Pinterest, Learnist, or ScoopIt, it is as important to be a discerning viewer and user of visual media as it is to be an expert producer.

Producing visual media expertly  is a skill my 4th grade students recently tackled when working on a biography project. Students have been studying Florida history with their social studies teacher, Shelly Zavon, and are working on expository writing with their language arts teacher, Stephanie Teitelbaum. Their teachers assigned them to research and write an essay about a well-known Floridian or person with strong ties to Florida. Since the students already had several sessions with me learning about website evaluation when “Googling”, I decided to introduce them to another search tool, Sweetsearch, which only searches a defined, safe list of websites. It was very easy for each student to find source material to write their essays.

Rather than concluding the project with the essay, we decided to have students create a visual representation of their work. I had been playing around with ThingLink and decided it was the perfect tool. ThingLink allows users to create media-rich images. Links to different media content are embedded in an image and can be viewed/read/listened to without leaving the image. The idea is, according to ThingLink, to “tell your stories.”

Once students completed the essay-writing-process, their first task was to find a Creative Commons image to use as a visual representation for their project. Most students found an image of the person. But others used an image of a statue of the person, an image of the Ringling circus cart, and an image of an old fort. Understanding the ethical issues surrounding the creation and use of images has been an ongoing learning process for my students and this project lend itself perfectly to reinforce those skills.

In ThingLink, the selected image functions as a starting point for the various types of media added. On the image, each item is represented by an icon, or “nubbin” in ThingLink lingo, of choice. To ensure consistency across their interactive, visual report, we agreed on the type of nubbin for each type of media content.

NubbinsReferenceSheetThingLink

In their ThingLinks, students were required to include their essays as links (a Google Doc published to the Web), the websites used as information sources for the essays (one “Person” nubbin each), and the proper citation for the images used (the “i” nubbin). All supplemental media content could incorporate any information in the bullets below, of which the students found a great variety.

  • Images
  • Biographical websites
  • Videos
  • Podcasts
  • Interviews (text and audio)
  • Museum exhibits
  • Statues
  • Quotes
  • Book reviews

Finding and evaluating other media content required students to think more deeply about the person they were researching in order to create meaningful representations.

To complete the process of creating a ThingLink, students used a checklist for self assessment.

Despite the fact that my 4th graders have been learning about using information ethically all year, there were still two of the 20 students who used images that were copyright protected. Consequently, both had to redo their projects–which took each only about 10 minutes at the most. Creating the ThingLink itself is easily accomplished, but selecting content to place in context and evaluating it is rather time-consuming. For student learning, this project was clearly about the process not the product. To create their interactive, visual reports, students learned and continued to build upon various skills, from the research and writing processes to digital citizenship to technology to visual literacy.

(BTW, there is also a free mobile ThingLink app, which as of May 2013 is still quite clunky, but I cannot wait to work with it once fully developed.)

Just like my students, I think you are going to find this visual format appealing. Here are some examples of the stories they are telling (click the images to open):

Introducing 2nd Grade Students to Research

To celebrate Black History Month our 2nd grade teacher asked me to collaborate on a student research project. Her general goal was for students to each learn about one famous African American. For me, this was an opportunity to bolster students’ information literacy skills by engaging them in some heavy duty research.

Pre-Activities

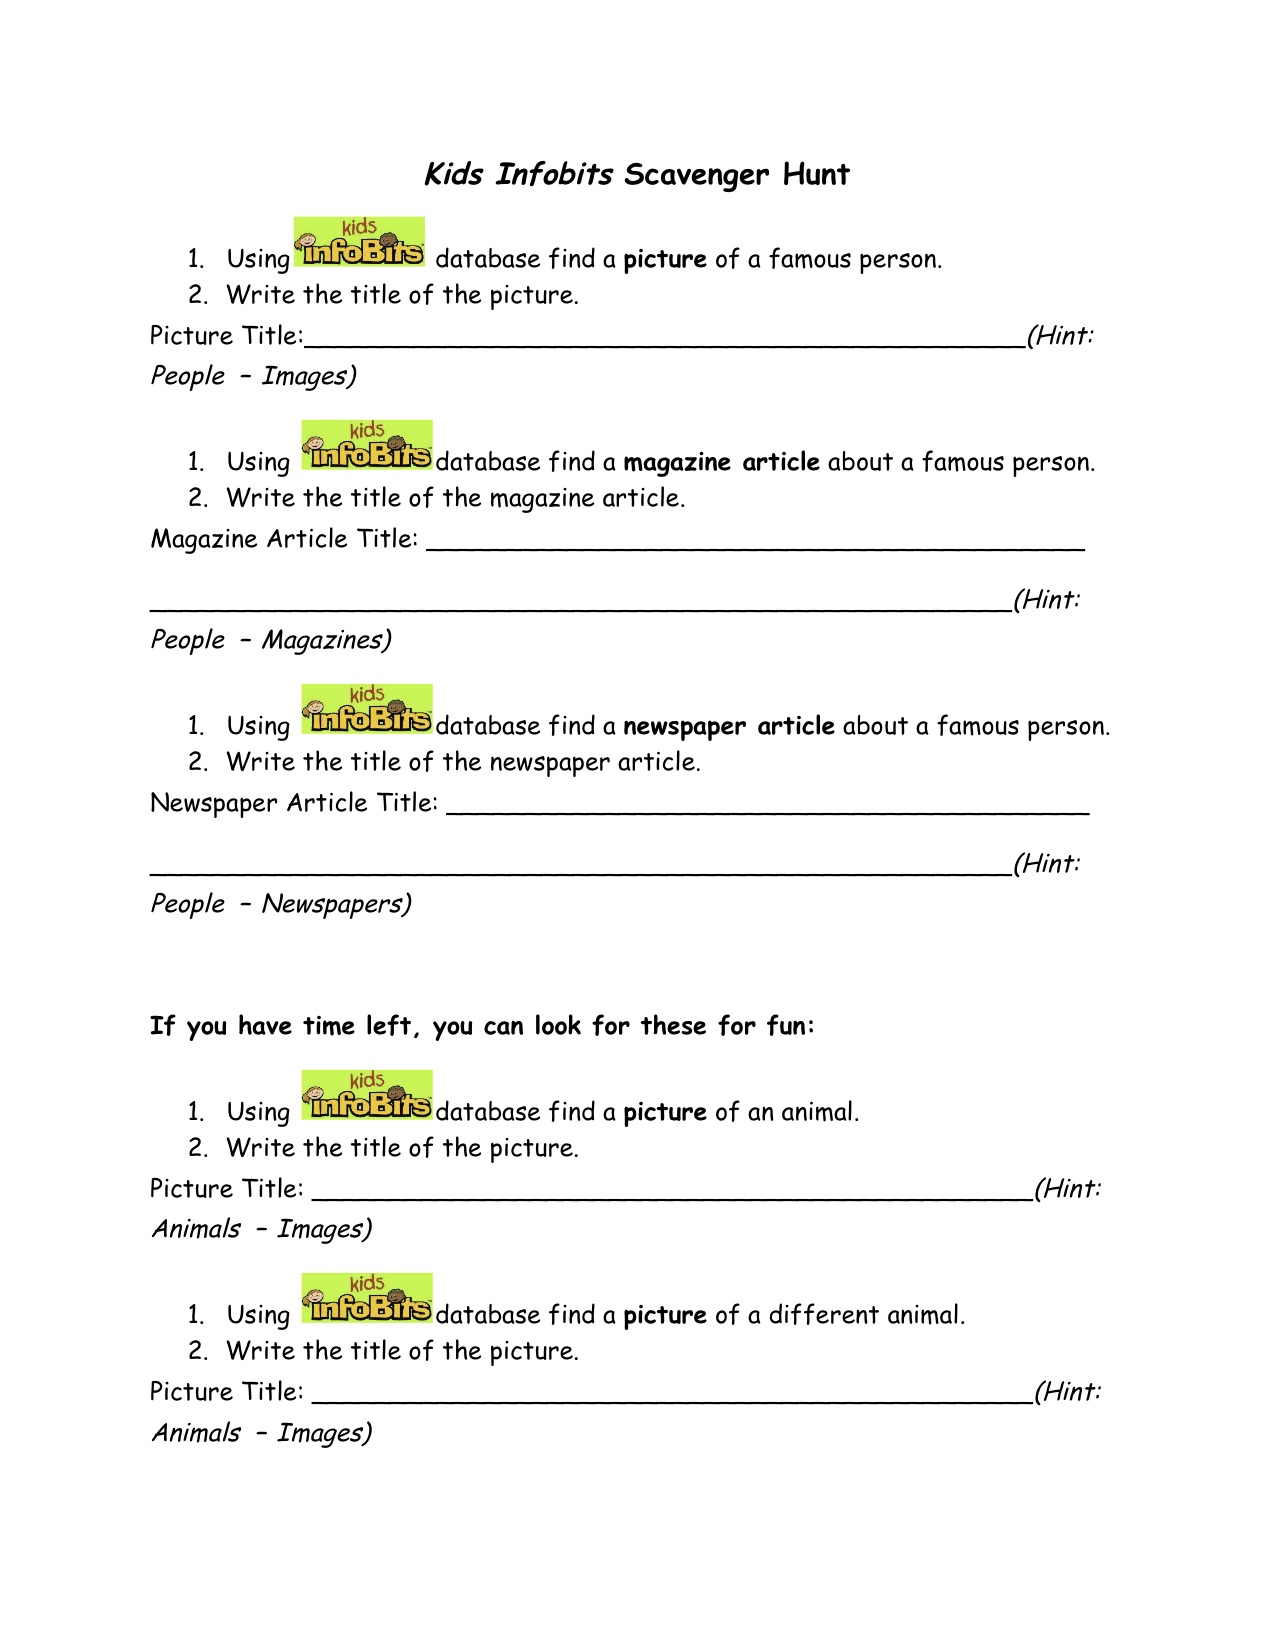
The first step was to assure students were able to define the biography genre. I asked them to explore a number of different biographies and then we collaboratively identified the information one can find in them. Next I introduced the students to our research tool, the Kids InfoBits (Gale) online database, which offers student-friendly articles on a variety of subjects. Inspired by a “scavenger hunt” created by librarians at Round Rock Independent School District, I created an adapted version for my students to let them explore Kids InfoBits.

KidsInfoBits Scavenger Hunt

Research

To guide their research, students used a simple graphic organizer (see timeforkids.com) requiring the completion of four major areas of information. Additionally, if students could find one, they were to add a quote by the famous person they were researching.

Biography Organizer

It turned out that some students felt overwhelmed by the amount of information available through the database and/or found the online articles too difficult to comprehend. So the classroom teacher supplied lower reading level print biographies to those students. Since the print text also offered many pictures, students were able to extract information more easily.

photo 2

Finally, I always want my students to self-check their work before we move on to the next step. So once the research process was completed, students used a Biography Check form I created using the Comic Life app for iPad.

Biography Check

Product Creation

My colleague and our school’s Director of Teaching & Learning, Andrea Hernandez, suggested students create an Associative Letter Report (see “Foundations for Independent Thinking: Look to Bloom and Marzano” by Liz Allen) as their cunulative project.

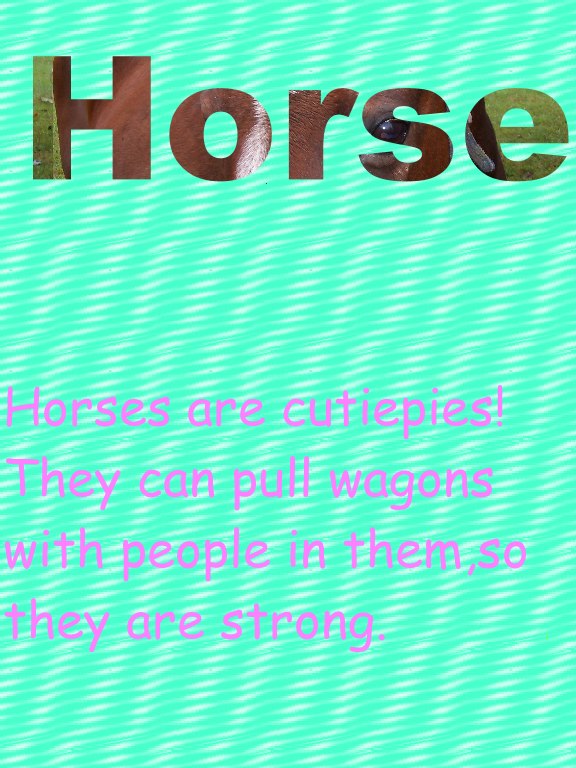
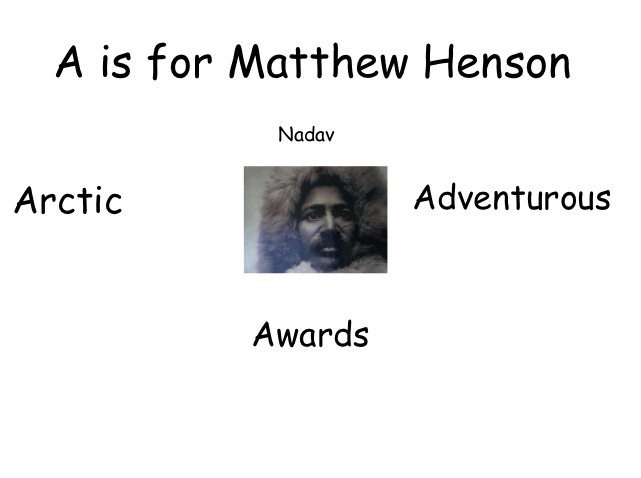
Similar to an ABC-style book, an associative letter report asks students to take what they know about a topic and organize the information around a specific letter. For example, a student assigned the letter “B” and Rosa Parks might write “B is for Rosa Parks because she was brave when she would not budge from her seat.”

So before creating the reports, students had to think of nouns and adjectives to describe their person–and to ensure all those nouns and adjectives begin with the same letter. This was not an easy task and involved some problem solving and thinking outside the box. We did not require a minimum number of words, but left it up to each student’s ability. Some of them thought of six words, others just two.

Pixie - Nadav1

Students used the Pixie2 software (Tech4Learning) to produce their reports. We gave a few guidelines, including font must be black for readability, titles should be large enough to read, one image per page. As before, once the reports were completed, I asked students to self-check their work by providing them with another checklist (also created with the Comic Life app for iPad).

Bio Project Check


Student products are presented in the following videos:

Part 1

Part 2

Presentations

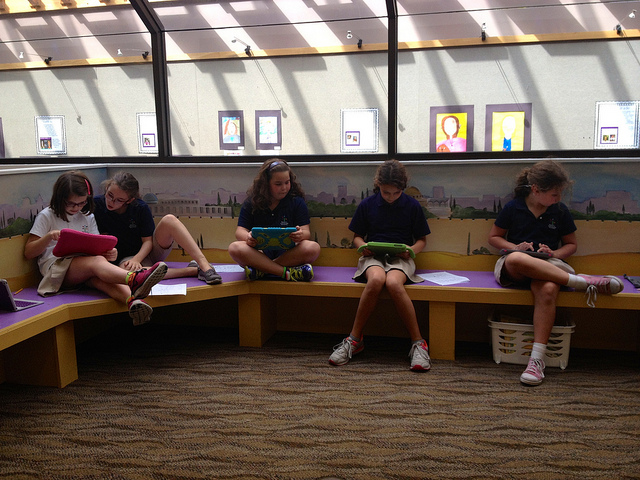
Students presented their projects to the class. We video recorded each presentation. As a next step, the classroom teacher will upload the report artifacts and recorded presentations to each student’s blogfolio. To conclude the project, students will reflect on their work and presentations.

photo 2
Reflection

My goals for this project were for students to conduct research, read for information, apply critical thinking skills to organize the information found, and create a final product using the information. It was an ambitious project, especially since the students had no prior research experience. But the students learned by doing. And while the research process was at times frustrating for some, I think all students improved their stamina to stay actively engaged in more in-depth projects.

The Pixie project was a great tool for differentiation. As their products show, some students created up to six separate slides with full paragraphs of text, while others created only one or two slides in the same amount of time with only a sentence or two. In this group of 19 students, there is clearly a range of developmental and academic ability represented and the project served this range well.

It definitely helped that the classroom teacher agreed to add an additional hour per week to our schedule. Initially, we met only once weekly — not at all enough time to allow students to “connect” to the project. In the future, I would definitely work out a schedule with the classroom teacher that involves the children multiple times weekly.

At times, a visitor to the classroom may have considered the lessons chaotic, but if he had listened closely, he would have heard students talk excitedly about “their famous person” to their desk neighbor, shared an image with another student, or helped a classmate in the use of Pixie. Students were focused on their work and engaged in learning throughout the project.

A Big Red Flag: Citations as a Source of Concern

My 4th and 5th grade students are currently writing ebooks: 4th grade on the short-lived local French colony, Fort Caroline, and 5th grade on the Lost Colony of Roanoke. The ebooks are culminating projects based on a previous unit I did with both classes using Diigo to organize information.

We began our ebook unit by looking at several excellent student-produced, non-fiction examples I had downloaded from the iTunes store. The examples included not only text, but also student-produced images as well as audio and video recordings.The books were creative and informational and served to motivate and inspire my two classes as they have begun the process of creating their own ebooks.

Standards_cover_200pxAs beautiful as the books are, however, not one cited any information sources. As a librarian, this is a big red flag! My practice as a school librarian is guided by the common beliefs expressed in the American Association of School Librarians’ Standards for the 21st-Century Learner (2009), one of which is:

“Learners…share knowledge and participate ethically and productively as members of our democratic society.”

In our copy-and-paste information world, how do we teach our students to use information both correctly and ethically? Most of my career, I have worked in higher education.  I have spent many hours teaching college students the various citation style formats. Even for these students, it is not an easy, nor enjoyable, task. But, as I tell my elementary students, you may not use someone else’s idea or work product and publish it as your own. It is as simple as that. Also, citations allow readers to not only access the original source, but also potentially find more information.

So I’ve spent the last two sessions with my 4th/5th graders discussing the need for crediting sources and creating citations. For this age group, I’ve decided to use a simplified Modern Language Association (MLA) format, consisting of author, web page and website titles, publication format, and date of access. (For this project, student research consists entirely of web pages.)

Reflection_ Citations_ A Source of Concern - Google Drive

As for understanding the need to cite sources, my students are savvy, already getting lots of practice as regular student bloggers. But creating formal citations is so much harder. Students have to understand not only the various elements of a citation, but also where to locate those pieces of information and then putting it all into the correct format. It is a tedious and time-consuming task, but we are getting there.

The process has been a learning challenge for my young student authors–and  their librarian alike. But as the AASL points out, source citation is a matter of ethics. I cannot wait to upload our ebooks to the iTunes store. But first, we have to master the specifics of full and proper citation! Those ebooks will be examples of not only “sharing knowledge” but also “participating ethically and productively as members of our democratic society.”

Resources
Copyright and Fair Use Guidelines for Teachers (Edudemic.com)

EasyBib: Free Bibliography and Citation Maker (Imagine Easy Solutions, LLC)

MLA Style (Purdue Online Writing Lab)

A Note Taking Exercise

I am currently teaching a unit on website evaluation to our 4th and 5th grade students. We meet weekly for a one-hour session over the period of eight weeks. This is integrated into a social studies unit on the presidential election.

The social studies teacher asked me to start off by teaching a lesson on note taking. As I told the students, it’s a skill they will use throughout their lives, not only in school but also in working life. Each class worked through a one-page encyclopedia entry on the Everglades I had copied from a Florida history text. We applied the two-column method as I personally like it for its versatility; it’s easily applied to text, film, lectures, presentations. As a class, we worked our way through the first few paragraphs, identifying the main idea and supporting detail. Then students worked through the remainder of the text in small groups.

For the students, the hard part was to avoid copying whole sentences rather than jotting down keywords/phrases, preferably in their own words. Their homework assignment was to then write an informational paragraph using just their notes (I collected the original text).

As teachers, we like those critical thinking skills that are put to use when students are taking notes. Students in both grades stated when asked why note taking can be useful: We use our brains. Indeed! So at the end of the lessons I asked students to fill out exit slips with the following questions: Why is it important to take notes? How can note taking help you with your school work? I’ve compiled the answers for each class in two separate Wordles:

4th Grade:

5th Grade:

Obviously the students got it: “to help remember information” was answered by all. Some went further and said it’s a good organizational tool, a study aid, helps with grades. A couple of 5th graders also added that it helps avoid plagiarism. I think the students understood the idea and importance of taking notes. Now they just need to continue to apply those note taking skills to become fluent.