Fostering Critical Thinking With State Research


14944259833_2eb862d7bd_z

My 4th grade students are studying Florida and its history in social studies class this year. Their teacher, Michelle Lewis, asked me to introduce them to digital resources related to the subject. Here in Florida, the Florida Electronic Library (funded by the State) makes available free to all its citizens a variety of electronic resources, including a Florida History database. After a brief introduction, I let the kids explore this resource via a scavenger hunt. They had so much fun with this that I decided to expand this project to a mini-research unit. Key elements of the mini-research unit are researching facts on two states, synthesizing information into a short written report, and creating a final digital report.

To facilitate the exercise I replicated the model report laid out in Liz Allen’s Research Without Copying presentation (2009)–a fabulous compilation of research presentation ideas, some of which are adapted from Nancy Polette’s book by the same title, challenging students to think critically about what they read and then synthesize the information learned in a variety of creative ways. Its a higher-level type of engagement with the material that ensures students better retain the information.

So on their next visit to the library, I introduced my students to the If…But Report. The idea was for them to research two different states, compile four facts for each state, and then compare and contrast the states in a one-page report, consisting of a written portion and a non-linguistic representation of the facts.

Research

The students scoured three pre-selected websites (kids.usa.gov, factmonster.com, and 50states.com) as well as the Kids InfoBits database for information. They were to find something interesting from each source and record the information on a graphic organizer.

GraphicOrganizerStatesResearch

Pre-Writing

Using a template, students drafted their reports. In a mini-lesson, we looked more closely at some student’s writing to discuss mainly style. For example, one student listed the state name in every sentence. Is this necessary? Is it interesting? Another student used big numbers to express the populations of his states. What would be a better way to tell the reader?

TemplateIfButReport

Report Creation

Using Pixie for iPad app students created their reports, which had to include a written portion as well as a non-linguistic representation of the facts gathered for each state. Even though I had originally planned three 40-minute sessions for this quick research and report project, it took five sessions. It was harder for some students than others to retrieve interesting facts from the sources. Also, the report writing was easier for some than others. All students, however, quickly created their reports using the Pixie app.

IMG_2412 IMG_2413

My students know that I expect quality work, so as a final step, they had to use a checklist. Those students who finished early, also had to write a brief reflection on their student blogs.

If...ButReportChecklist1

Here are some of the wonderful examples of the final product.

SaylorBy Saylor S.


image2-e1413909231942By Eliana M.


Advertisement

Coding: Taking On the Challenge of a New Literacy

One week last December coding was all the rage in educational institutions across the country. The Hour of Code™ effort aimed at exposing children in grades K-12 to the basics of computer programming and was spearheaded by a nonprofit organization, Code.org. This effort was endorsed by President Obama, Bill Gates, Mark Zuckerberg, and many other industry and business leaders in hopes of highlighting the ever-increasing gap between demand and supply of computer programmers. But the “Hour of Code” represents so much more than a fun module of learning: it is an effort to inspire deeper recognition of the building blocks of the digital universe. I introduced my version of the Hour of Code™ to our students in March.

Basic Tynkering Around

There are many great tools available to introduce basic coding skills. Kindergarten used Kodable and 2nd grade learned with Tynker for iPad. Both apps are free in the iTunes store and are very user-friendly, introducing basic programming concepts and problem solving in a kid-friendly way. Both classes LOVED playing around.

IMG_1554

IMG_1588

Intermediate Dabbling

I wanted to delve more deeply into coding with my 4th and 5th grade students. My 5th graders had been repeatedly asking me over the last months about the opportunity to code. So now I wanted to know from them what they knew about coding. Turns out several of the students had a very good understanding and a couple had already dabbled with coding. To get everyone excited, I showed them the 60-second teaser created by Code.org, Anybody Can Learn.

We spent our first lesson with the Angry Bird tutorial available on the Code.org site. The tutorial uses Blockly, a graphical programming language developed by Google, requiring students to drag blocks together. It consists of 20 game-like puzzles, which increase in complexity.

Learning to Fail. So while the kids were flying through the first eight or so puzzles, many were suddenly facing some challenges. We knew from the beginning that we would never finish all the puzzles in the lesson. The goal was just to introduce students to these new coding activities. Even though we did not have enough time to work through all puzzles in our lesson, several students decided to finish the tutorial on their own time. Perhaps the key to effective instruction on coding is to borrow Carol Dweck’s term “Growth Mindset” vs. “Fixed Mindset.”  The point is to emphasize the process and not the outcome. Once the tutorial is completed (with always more to learn!), a certificate will be emailed to the students. In addition to a certificate, however, my students asked me for a badge to be added to their Badge Backpacks. We are consciously integrating badges and certificates as additional achievement markers, such as genre reading badges.  My colleague, Shelly Zavon, is currently offering badges for various math activities.

Free Reign to Logic and Creativity!

Next, I introduced both classes to MIT Media Lab’s Scratch, a different programming language which uses the same basic graphical commands as Blockly. My goal was for students to create an interactive animation using Scratch. So we watched a great introductory video that briefly shows the various creative project possibilities. The kids were immediately hooked and ready to “scratch”.

My 4th graders were tasked with creating an interactive virtual pet animation and the 5th graders were to create an interactive About Me collage showing three things about themselves. The former is a project my colleague Andrea Hernandez had done with her students a few years ago and the latter is an adapted lesson from the Scratch Curriculum Guide Draft (2011). In all, students spent three 40-minute lessons “scratching”. Judging by their motivation and engagement, they could have easily spent even more time.

Transferrable Skills

So why did I decide to integrate coding skills into my library and media curriculum? Aside from the fact that my students had been bugging me about it, I was very curious about all the hubbub during the Hour of Code™ week. Both the Code.org site and MIT’s Scratch made it easy for me to learn some very basic coding skills. Coding is actually a lot of fun! Moreover, after witnessing my students in-action, from an educator’s perspective, coding empowers students with new literacy skills that:

  • engage students in new ways of thinking
  • develop problem-solving skills
  • strengthen mathematical and computational thinking skills
  • teaches sequencing
  • fosters creativity

All are transferrable skills.

In the meantime, several students created their own Scratch accounts to continue scratching–the biggest testament to student motivation and engagement!

The 4th and 5th grade students posted their final products to their student blogfolios. Following are some examples. To view them all, please search the tag MJGDS on the Scratch website. Or check out the following selected creations:

http://scratch.mit.edu/projects/19456206/

http://scratch.mit.edu/projects/19520328/

Structuring a Lesson on Digital Citizenship

I have been working with my 2nd through 5th grade students on digital citizenship. There are lots of great instructional resources available online, but I have grown partial to Common Sense Media’s lessons and video library. While this not-for-profit organization suggests a scope & sequence for teaching the various topics/building blocks that make up digital citizenship, I’ve decided to adapt some of the lesson plans to better suit my students’ needs. My fourth grade students just completed their last unit lesson, “Digital Citizenship Pledge”. For a final product, they created Digital Citizenship posters.

We began by brainstorming everything we had learned these past few weeks about digital citizenship and discussed adding a motto or slogan to our posters. How do you package a concept like digital citizenship into a few catchy words? Not an easy task for some of the kids, but in the end they came up with great posters.

20140115-143036

I do know that the students understand the various elements that make up digital citizenship, but in hindsight I don’t think creating the posters was the best artifact for students to show their learning. This already occurred to me while the students were brainstorming their mottos. Even though we came up with many examples from the advertising world and discussed how mottos are short and catchy, there were still some students whose mottos consisted of two long sentences. Also, while creating this poster was definitely a quick process, it was too general.

So for my 5th grade students, who have also completed the digital citizenship unit, I’ve decided to change things up a bit.  I’ve provided more structure in the form of a worksheet. Students are to choose from one of the five main topics we learned about digital citizenship. They then think of a motto, decide on the digital product they plan on creating, and brainstorm important points and key vocabulary they will include in their artifact.

Digital Citizenship

So far, most students have  completed the worksheets and  I am encouraged by the level of detail they provide and the creativity they show. So stay tuned for a great variety of student-created artifacts about digital citizenship!

IMG_1378

Retelling Stories of Author Chris Van Allsburg

My 4th grade students have been working on “retelling.” Their language arts teacher, Andrea Hernandez, asked me to work with the kids on this project after reading my post about retelling in 1st grade. The students began by watching some examples of 1st grade students retelling The Paper Bag Princess. They noticed that retelling is about telling a story again, emphasizing the various story elements, and speaking fluently and with expression. Since they had just learned about writing summaries in language arts class, they also noted it was okay to give away the ending of a book when retelling. When summarizing, however, one should “not give away any spoilers”.

For their retelling project, my group of ten 4th grade students focused on books by Chris Van Allsburg. This was a practical decision based on the fact that our school library owns several of his books, most are on my kids’ reading levels, and none of the kids were familiar with Van Allsburg’s work. Students began by finding a comfy spot in the library to read the book, study the illustrations, and then discuss the story.

IMG_1358

IMG_1357

The students then used a graphic organizer to help identify their story’s elements. Agreeing on the main events was challenging for some of the students, forcing them to convince their partners of their opinions. It was great listening to the kids digging deep into the stories!

TemplateRetelling4th

Once the graphic organizers were completed, students began practicing retelling the stories to their partners. This was much harder than they had expected. The fact that I meet the students only once weekly for 40 minutes did not help. For some of the kids, at least, it seemed they needed a bit of time to get back into the story either by re-reading the book or carefully studying their organizer. I strive to let my students be as independent and self-directed as possible. So for this project I wanted the partners to coach each other’s story retelling by providing constructive feedback. Of course the added plus was that this also allowed the students to learn from each other. To aid in this process, I created a checklist.

TemplateRetellingChecklist4th

Once students felt ready, the next step was to video record each other retelling the story. Some times it was camera shyness, other times it was lack of preparedness, and in some cases it was a matter of fluency–but for all students the recording stage consisted of multiple takes. In a couple of instances, students edited their own retellings, requiring a reminder that edited versions were not the point of retelling.

IMG_1424IMG_1428IMG_1416IMG_1445

The last step was for students to embed the retelling video and write a brief post on their student blogfolios. Please watch some of their retellings, read their posts, and leave a comment!

Abigail Retelling from MJGDS Classrooms on Vimeo.

Isa’s Retelling from MJGDS Classrooms on Vimeo.

Modern Classroom Learning: Creating and Publishing Collaborative eBooks

Photo Skitch Document

Photo Skitch Document-1

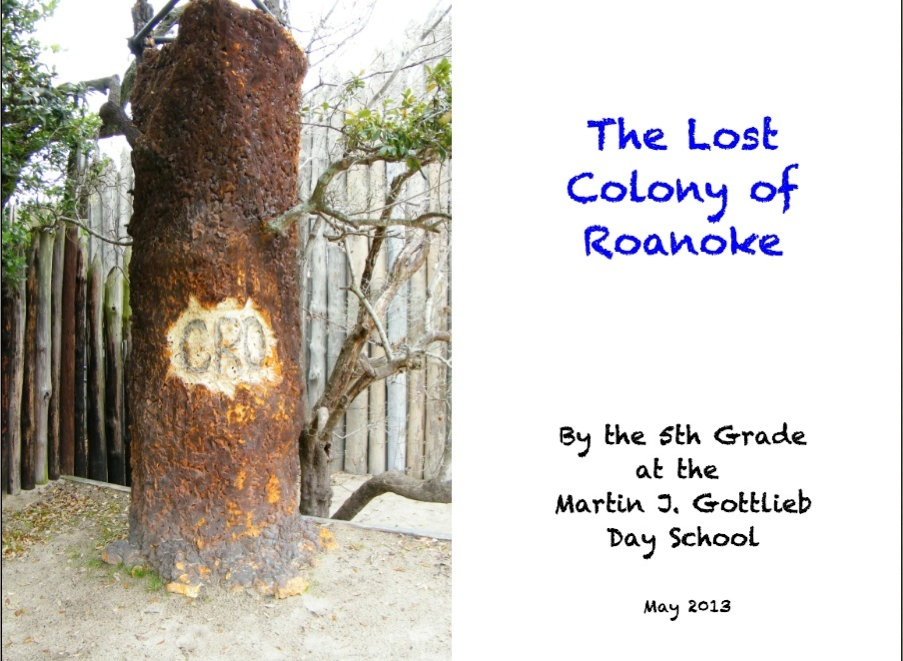
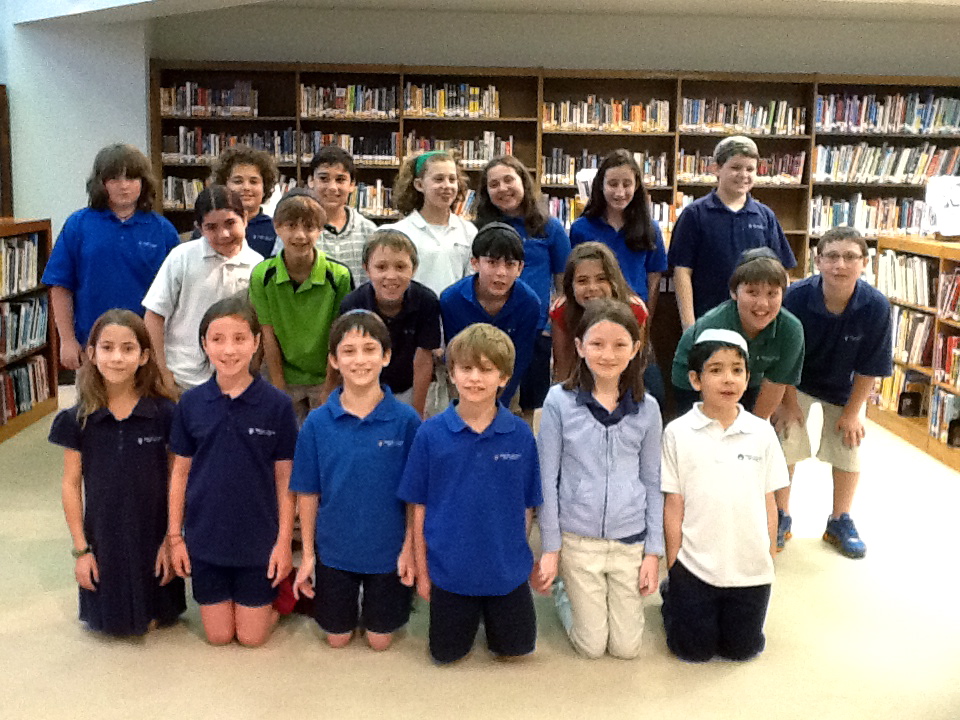
My 4th and 5th grade students finished creating ebooks on Fort Caroline, the first French settlement attempt in the New World, and the Lost Colony of Roanoke, respectively. This was a collaborative project with their social studies teacher, Ms. Shelly Zavon. Information sources were web-based, previously gathered, organized, and annotated using Diigo. Each student (5th grade) or student pair (4th grade) contributed a chapter to their class books.

1. Brainstorming. Drawing on their subject knowledge, students began by brainstorming possible chapter topics and then putting them in an order.

Untitled document - Google Drive

2. The Writing Process. Once topics were distributed, students began the pre-writing stage by selecting relevant websites, reading the information, and taking notes to organize their ideas. Students used Google Docs and each shared their documents with the classroom teacher and me. This allowed us to provide immediate feedback. In addition, some students also chose to share their work with friends in the class, seeking their input as well. It was particularly important to provide feedback to students at this pre-writing stage as some found it difficult to narrow information to their particular topic or to simply stay focused on their section of the book to avoid overlapping with another section. And we needed to make sure that facts were accurate. Since the writing process required several stages, including extracting relevant information from the sources, drafting, revising, and editing text, it took multiple sessions.

The Colonists - Google Drive

It was very important to me that students take ownership of this project. So, periodically, we checked our progress as a group. We read through all draft sections and checked facts, suggested word choice changes, provided syntax and grammar corrections, and incorporated transitions between the sections. Reading as a group had the added benefit of providing each student with a better idea on their classmates’ content.

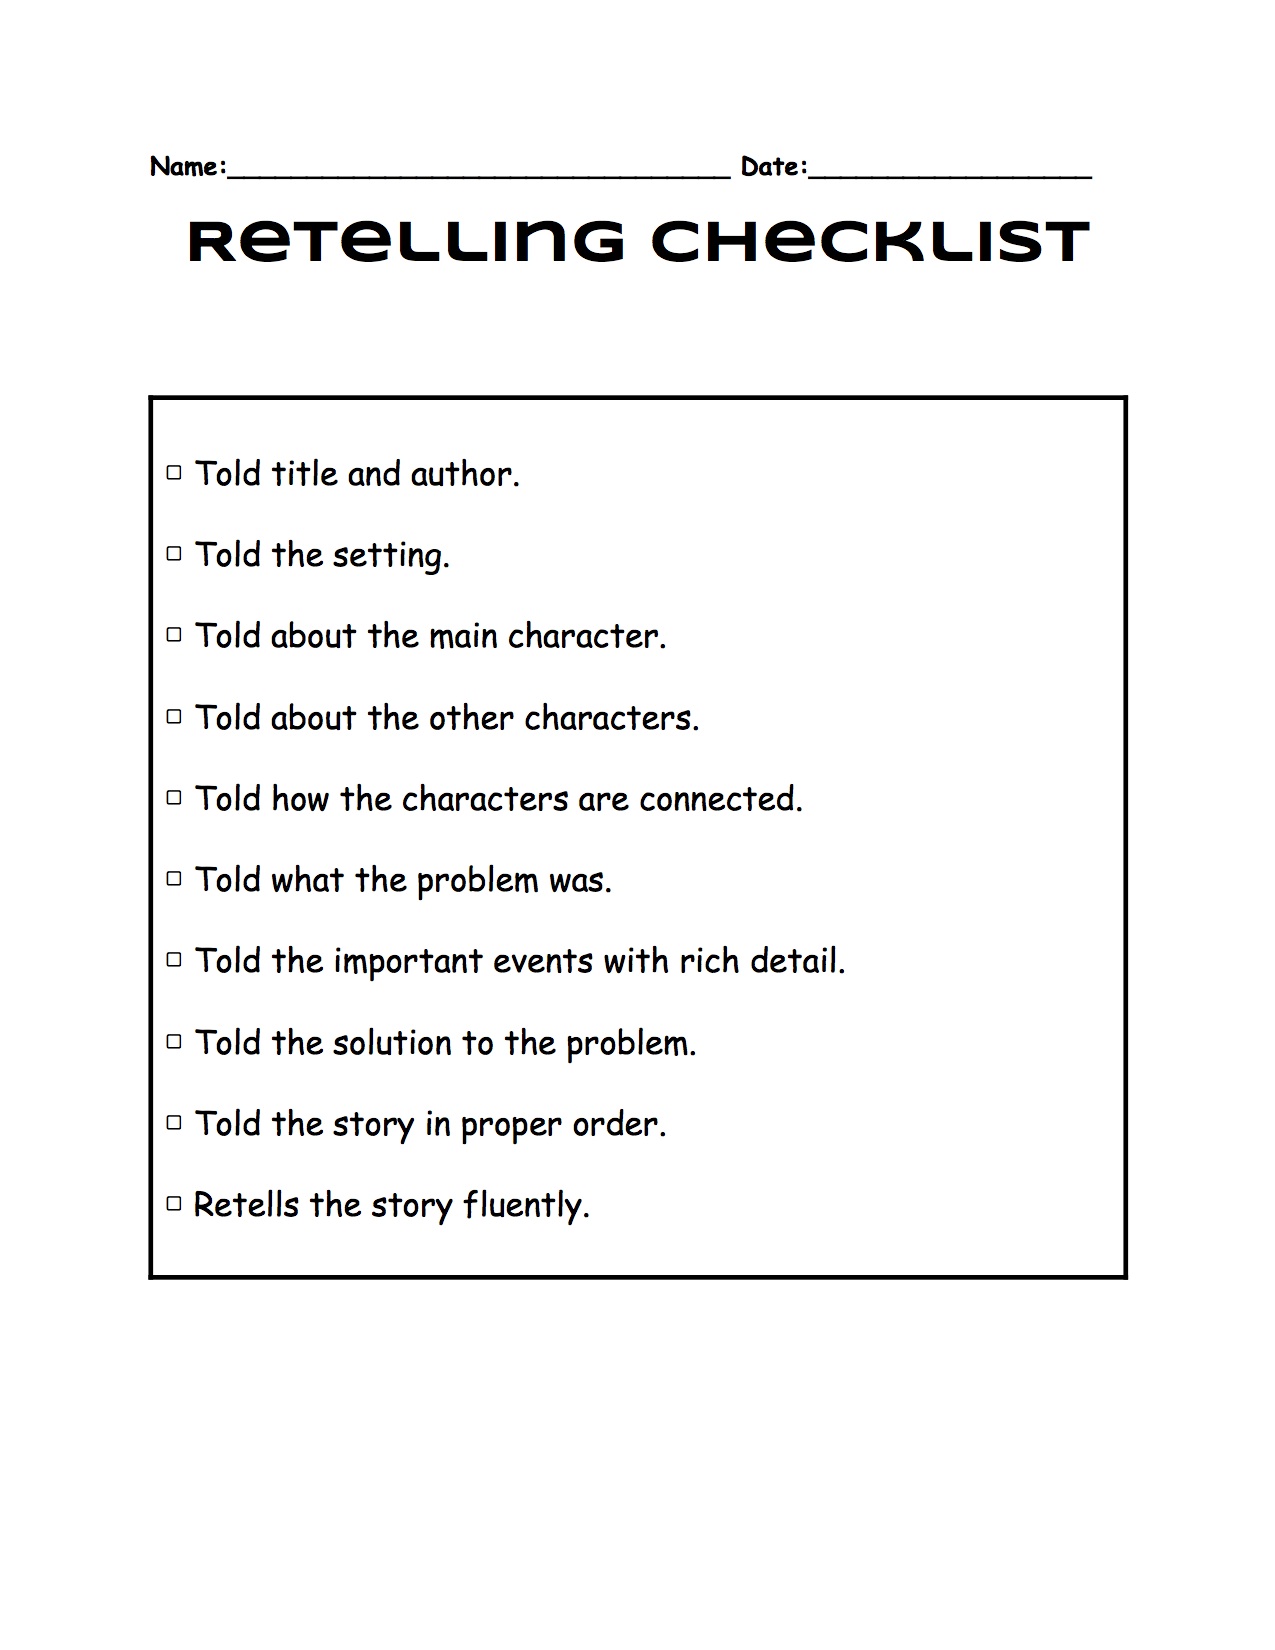
Also, once drafts were complete, I provided each student/student pair with a checklist to ensure writing mechanics were in order. Checklists are a great form of self-assessment for the students that ensure learning and also provide them with a sense of project ownership.

eBook Checklist3. Images. Each section was to include at least one relevant image. This allowed me to teach a mini-lesson Creative Commons images and where and how to find them. For our history topics, we found Wikimedia Commons a great resource.

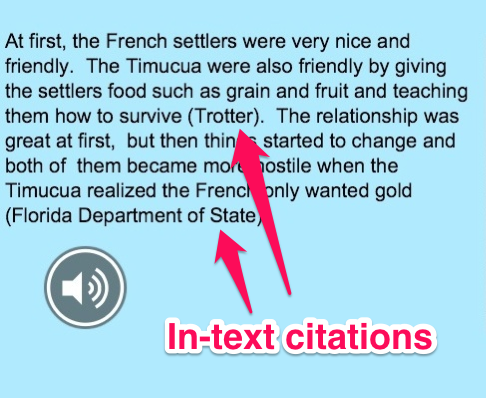
4. Information Ethics. Creating and publishing an ebook is a great tool to teach students digital citizenship. For this project, I introduced an adapted version of the MLA citation style. Students learned to create proper citations for both text and images. Their sections include in-text citations.

Photo Skitch Document

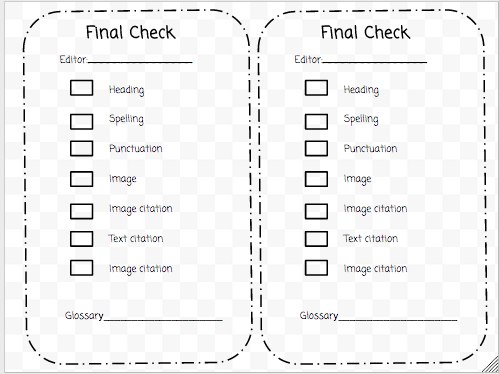
5. Product. Students used BookCreator app for iPad to create their books. Before importing text and images, students checked each other’s work one last time. For this purpose, I provided them with a Final Check sheet. Fifth grade students also compiled a glossary and editors were asked to identify words/phrases to include in the glossary during the final check.

eBook Final Check - Google Drive

The last step was to decide on a format for the ebooks. Each class brainstormed several options for font style, color and size as well as background color.Each also co-designed the book covers and wrote group reflections. Once their sections were finalized, they sent them to me via email as ibooks. I combined the books into one and added the Table of Contents, Works Cited,  Image Credits, and, in the case of 5th grade’s book, the Glossary pages. The final products are multi-modal, including text, audio, images, and hyperlinks.

6. Assessment. The classroom teacher and I informally assessed both the process and the quality of work through observation and reading of all documents at each drafting stage. If we felt we had to take a step back to bring the group together, we did take the time. For example, after reading all drafts, we realized that there was some repetition of information between different book sections. To ensure the students own this project, we then read all drafts as a class to identify repetitive information. We also continually provided feedback on all written work. Most students received comments/suggestions from both of us.

IMG_0614

photo 3

Reflection

For both my colleague, Shelly, and I this project was meant to not only deepen our students’ understanding of the time periods and historical events they researched by engaging them in the publication of a book, but from the beginning we wanted this to be a student-centered/student-owned project. Creating and publishing ebooks is a very involved process, but it is worth the time spent planning and then guiding the students.

This project promoted the development of multiple literacies. Students learned so many skills, from writing (organization, word choice, sentence fluency, transitions, and mechanics) to editing/proofreading to finding Creative Commons images to citing sources to collaborating to  fluently transition between multiple apps (Google Drive, browser, BookCreator) to publishing. This project incorporated all the hallmarks of modern learning: Creativity, Critical Thinking, Collaboration, and Communication.

Should you decide to hop on the ebook publishing train with your students, remember to be flexible and to allow time. Each stage of the project evolved slowly in accord with their own unique tasks–research, writing, publishing. Slow but deliberate work is key. In retrospect, the project was more about the process than the end product, not only for the teachers but the students as well (read the “Project Reflection” pages in their ebooks).

My students are sharing their work with a global audience and are looking forward to receiving authentic feedback — from you! Please leave them a comment.

Click to download books from the iBooks store:

The Lost Colony of Roanoke:

Fort Caroline: The First French Settlement in the New World

Or view them below:

Interactive, Visual Student Reports

According to Wikipedia, visual literacy is

the ability to interpret, negotiate, and make meaning from information presented in the form of an image, extending the meaning of literacy, which commonly signifies interpretation of a written or printed text. Visual literacy is based on the idea that pictures can be “read” and that meaning can be communicated through a process of reading.

In today’s digital information economy, visual media and visual literacy are more important than ever. Developing the skills necessary to successfully negotiate the digital information universe, however, can be a challenging task. While anyone can create and share visual media, from basic image sharing via Facebook or FlickR to curation sites that rely on images such as Pinterest, Learnist, or ScoopIt, it is as important to be a discerning viewer and user of visual media as it is to be an expert producer.

Producing visual media expertly  is a skill my 4th grade students recently tackled when working on a biography project. Students have been studying Florida history with their social studies teacher, Shelly Zavon, and are working on expository writing with their language arts teacher, Stephanie Teitelbaum. Their teachers assigned them to research and write an essay about a well-known Floridian or person with strong ties to Florida. Since the students already had several sessions with me learning about website evaluation when “Googling”, I decided to introduce them to another search tool, Sweetsearch, which only searches a defined, safe list of websites. It was very easy for each student to find source material to write their essays.

Rather than concluding the project with the essay, we decided to have students create a visual representation of their work. I had been playing around with ThingLink and decided it was the perfect tool. ThingLink allows users to create media-rich images. Links to different media content are embedded in an image and can be viewed/read/listened to without leaving the image. The idea is, according to ThingLink, to “tell your stories.”

Once students completed the essay-writing-process, their first task was to find a Creative Commons image to use as a visual representation for their project. Most students found an image of the person. But others used an image of a statue of the person, an image of the Ringling circus cart, and an image of an old fort. Understanding the ethical issues surrounding the creation and use of images has been an ongoing learning process for my students and this project lend itself perfectly to reinforce those skills.

In ThingLink, the selected image functions as a starting point for the various types of media added. On the image, each item is represented by an icon, or “nubbin” in ThingLink lingo, of choice. To ensure consistency across their interactive, visual report, we agreed on the type of nubbin for each type of media content.

NubbinsReferenceSheetThingLink

In their ThingLinks, students were required to include their essays as links (a Google Doc published to the Web), the websites used as information sources for the essays (one “Person” nubbin each), and the proper citation for the images used (the “i” nubbin). All supplemental media content could incorporate any information in the bullets below, of which the students found a great variety.

  • Images
  • Biographical websites
  • Videos
  • Podcasts
  • Interviews (text and audio)
  • Museum exhibits
  • Statues
  • Quotes
  • Book reviews

Finding and evaluating other media content required students to think more deeply about the person they were researching in order to create meaningful representations.

To complete the process of creating a ThingLink, students used a checklist for self assessment.

Despite the fact that my 4th graders have been learning about using information ethically all year, there were still two of the 20 students who used images that were copyright protected. Consequently, both had to redo their projects–which took each only about 10 minutes at the most. Creating the ThingLink itself is easily accomplished, but selecting content to place in context and evaluating it is rather time-consuming. For student learning, this project was clearly about the process not the product. To create their interactive, visual reports, students learned and continued to build upon various skills, from the research and writing processes to digital citizenship to technology to visual literacy.

(BTW, there is also a free mobile ThingLink app, which as of May 2013 is still quite clunky, but I cannot wait to work with it once fully developed.)

Just like my students, I think you are going to find this visual format appealing. Here are some examples of the stories they are telling (click the images to open):