Liquid Learning: Using Subtext as a Digital Learning Enhancement

I was very fortunate to spend some valuable reading time every week during our third quarter with seven 5th grade students. Their language arts teacher, Andrea Hernandez, wanted to provide these students with a more personalized approach to close reading instruction. All seven students are excellent readers and we decided to challenge them with an unabridged classic, Around the World in 80 Days by Jules Verne. Since these students are in our pilot 1:1 iPad classroom and because I’ve been looking for a reason to give it a try, I decided to immerse our little group in a digital reading experience of this classic novel via Subtext for iPad app.

imgres

Subtext is a product of Renaissance Learning company (yes, of Accelerated Reader software fame), designed as a “collaborative ereading experience for K12 classrooms.” I chose to use the free, basic version of the app, which provided us with enough functionality. Alternatively, for a fee, users can upgrade to the premium features, offering access to CCSS-aligned assignments, text-to-speech option, and access to leveled nonfiction and informational texts. The only premium feature I would have liked to try out is the ability to track student progress. But since my group consisted of only seven students, it probably would not have made a difference. The basic version provided us with enough adequate functionality to upgrade our novel study to a new form of a social reading experience.

The app offers access to a large collection of ebooks, some for a fee and some are free. Since our classic is available in the public domain, we all downloaded a free version of Around the World in 80 Days directly into the app. I then created a “5th Grade Reading” group, inviting all seven members to join. Instructors have the ability to “enable student restrictions”, effectively preventing students from navigating the Web and sharing notes. I am not sure what the point of such restrictions is in an ereading environment, so opted to not turn them on.

IMG_0273

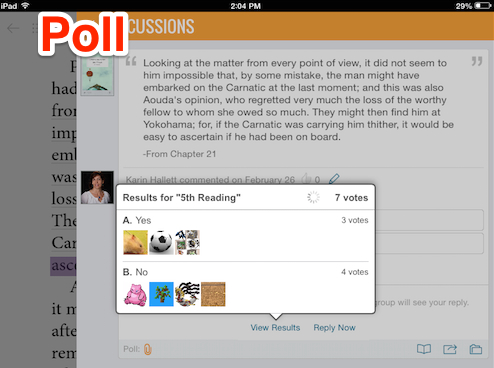
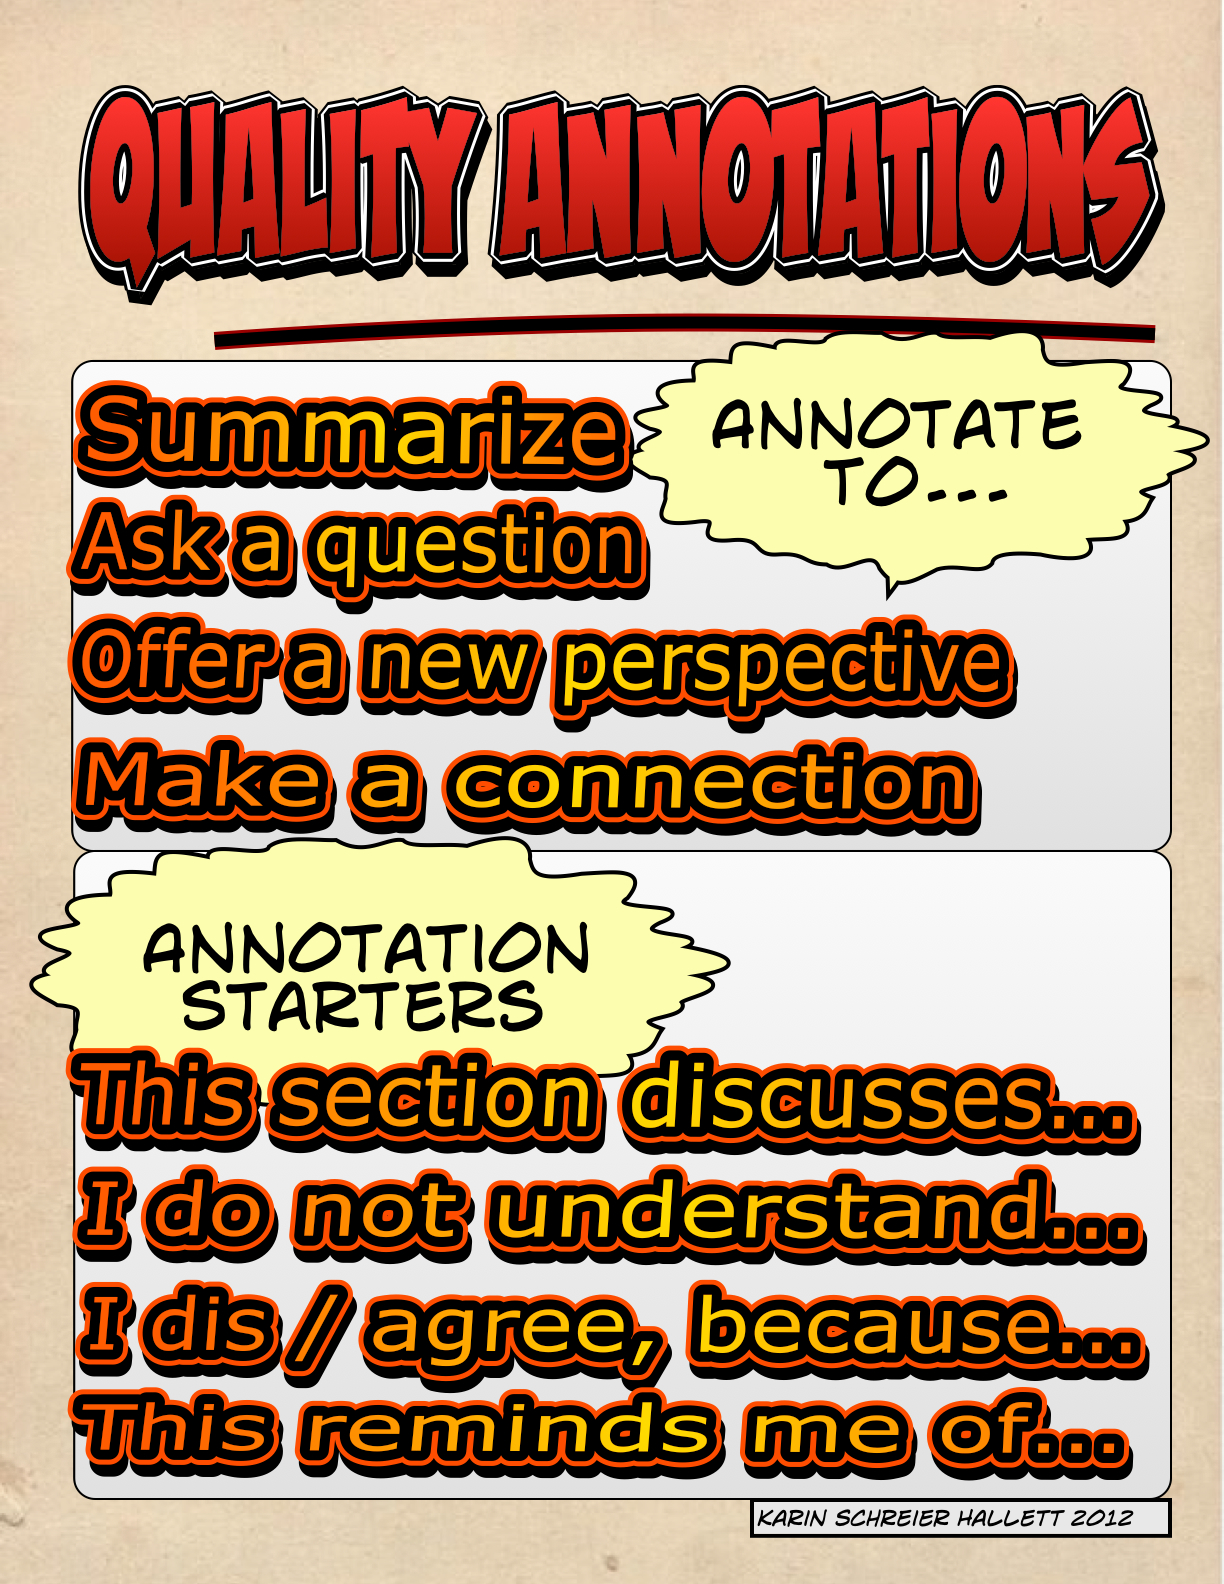
Mostly students read outside of our limited class time. To ensure students were reading more deeply and to assess understanding, I built discussion questions, multiple choice assessments, and polls directly into the text. These features allowed me to view and assess student responses prior to our next meeting in order to then focus on those parts of the text that needed clarification. As the teacher, I had the option to hide all responses until students submitted their answers.

Responses

Poll

MultipleChoice

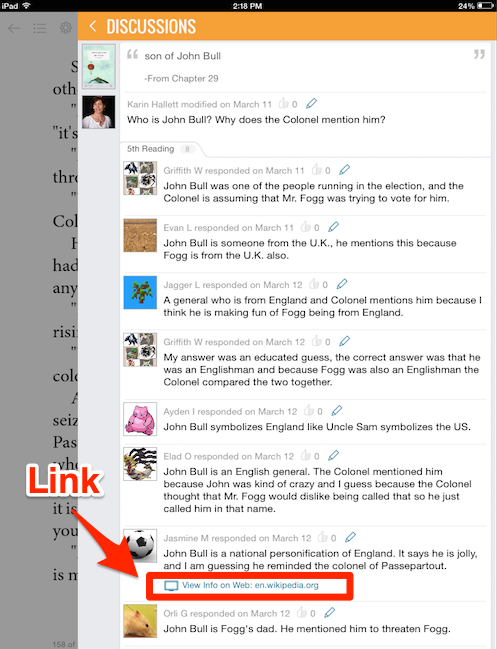
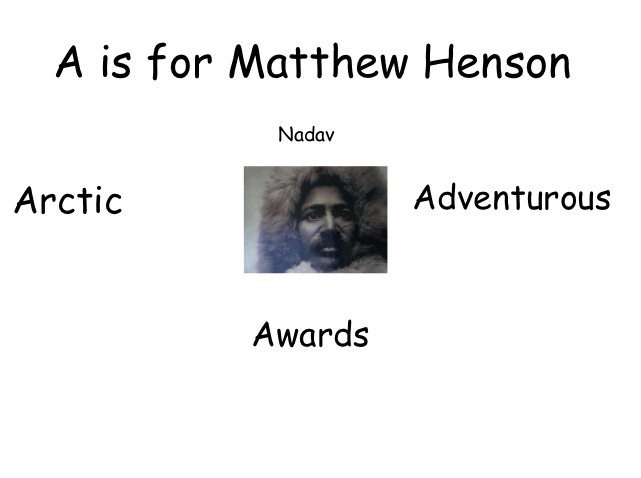
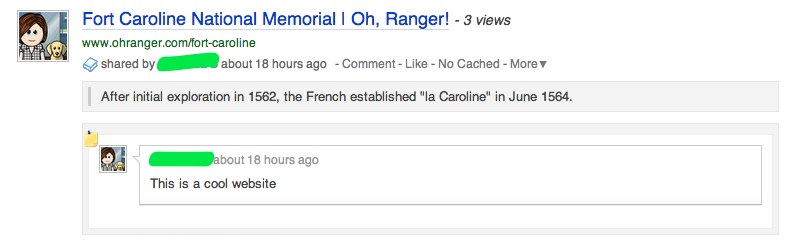
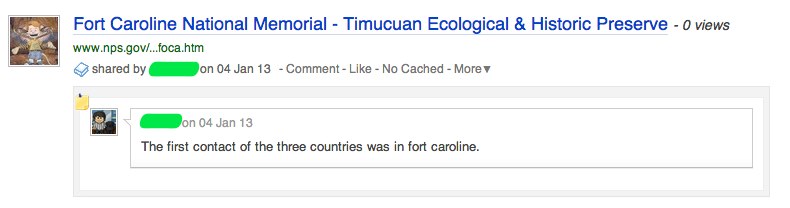
Another value-added feature of Subtext is the ability to embed links to websites, images, or videos. To help build background knowledge, I linked to information about the author, the Suez canal, a map of the British colonies and another of colonial India, an image of a cow catcher mounted to the front of the old American locomotives, and more. Students also were able to embed links into their comments.

StudentWP

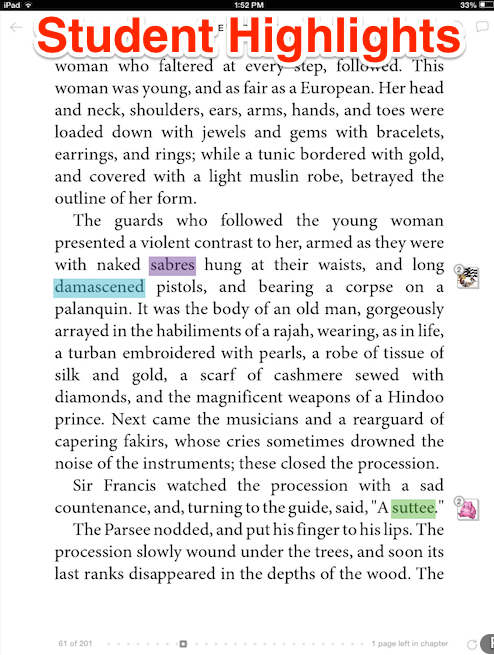
While reading, students highlighted words or entire passages and added notes. They then had the option to share the notes with the group. Simply tabbing a word pulled up a built-in dictionary, complete with audio pronunciation of the word and links to search both the Google search engine as well as Wikipedia.

StudentHighlights

The last feature we used is Subtext’s build-in link to Google Drive. Since our school uses Google Apps for Education, all our students have Gmail accounts and access to Google Drive. We shared a Google Doc of our schedule and this build-in link allowed us seamless access.

Would I use Subtext again? Yes! Using the app as a tool allowed students a different way of connecting with our text. Reading in groups is a social activity where students are learning with their peers. But using this digital tool elevated our small-group reading to a more inclusionary/participatory level by giving even those students who are usually not very vocal an equal voice. The lesson also demonstrates the power of liquid learning–most of the work was done outside of class. Also, the ability to build-in questions and to embed links facilitated active reading–although some students complained that the “the discussion questions…got in the way when there was a good part.” Most importantly, liquid resources like Subtext enable teachers to transcend the classroom and even school boundaries. Spending time together with a good book can include students across the room or literally across the world!

Advertisement

Authentic Learning: Creating I SPY Books in the Library

IMG_1178

Teacher Learning: 2nd Graders LOVE I SPY Books

It all began one Friday morning when I found my 2nd grade students sitting comfortably together in the library looking at I SPY and Where’s Waldo books. I thought: I must do something with those kids and those books! Turns out that Jean Marzollo, author of the I SPY series has a fantastic website. There she posted this challenge: A free 15- to 30-minute Skype visit with any class that creates “their own original beautiful I SPY pictures and write their own fantastic I SPY riddles.” I presented the idea to the kids and they were ready to take on this challenge!

I SPY Letter

Student Learning: Media Literacy

define_media_literacy_-_Google_Search

We spent our first lesson looking more closely at a number of different I SPY books, paying special attention to the image collages (choice of items displayed, arrangement of items, photographer perspective) and noting the beat and rhyme of the riddles.

IMG_1348

To help students begin thinking about their individual pages for our class I SPY book, I created an organizer. It outlines the steps to create a page in the book as well as provides a space for writing the riddle. I wanted them to just brainstorm some ideas. Several kids knew exactly what items they wanted in their collages and drafted their ideas on the back of the paper. Other kids already practiced writing riddles.

Form- I SPY

Student Learning: Visual Literacy

define_visual_literacy_-_Google_Search

Our next lessons were all about creating the image collages. We began by talking about what to look for when creating a collage using some examples I had prepared: not crowding the picture to make sure we can identify all items, taking the photo from a bird’s eye view, leaving a two-finger-spaces border, making sure to take a straight not crooked picture. Students used poster board as background. They were free to choose any items they found in the library for their collages. However, the big hit were the two bins of toys our 2nd grade teaching assistant, DeeAnn Wulbern, supplied on loan from her two sons.

DSC_0009DSC_0014

Student Learning: Problem Solving

Some students worked in pairs, others preferred to create a collage on their own. We actually had two “gos” at this: our first attempt taught us that the white poster board worked better as background than any of the other colors. Also, its larger size provided more space for more creative creations. While I had mentioned to students that they should think of the riddles while creating their collages, none really did and were stuck when DeeAnn and I asked which items in their collages rhymed.

Finally, when the students returned the following week, we emphasized that in each collage there needed to be at least two rhyming items. Several students quickly figured out how to best approach this issue by first finding the “just right” item and then searching for something else that rhymes with it. Only then do you look for other things to add to the collage. Watch our student Talia explain the process of creating an image collage.

Once the collages were created, students took pictures using the iPad. It was not always easy holding the iPad perfectly straight and still, or even be up high enough to get the full bird’s eye view. Multiple pictures were taken and the best selected.

DSC_0028DSC_0017

Student Learning: Rhythm and Rhyme

I SPY riddles are written in a 4-beats per line rhythm and an aabb rhyme format. Our students wrote 2-line riddles. To better grasp the rhythm, we listened to some examples of student-created I SPY raps on Jean Marzollo’s website. We also clapped with the beat using some example riddles. If you’d like more information on her riddles, see Jean Marzollo’s brief video on “How to Write an I Spy Riddle”. The students then got to work using the following template:

Template__I_SPY_Riddle_-_Google_Drive

Student Learning: Digital Literacy

define_digital_literacy_-_Google_Search

Each student created an I SPY page using the BookCreator app for iPad. They imported their images into the app and then typed their riddles, choosing legible fonts and using the dictionaries to ensure correct grammar and spelling–because, remember, Jean Marzollo is looking for quality work!

Teacher Learning: A Project Worth Repeating

The students and their teachers LOVED this hands-on project. It highlights the four Cs of modern learning: critical thinking, communication, collaboration, and creation. But best of all, it is an extremely engaging project. Now we are ready to visit with Jean Marzollo via Skype for her feedback on our great product. Take a look!

Download on the iBooks store:

Motivating Literacy: Digital Badges in the School Library

Badge Display

Most of my 2nd to 5th grade students tend to read within the same literary genre. Fantasy is by far the most popular, from the Magic Tree House to the Deltora Quest and Percy Jackson series. To motivate my students to explore other genres as well, I’ve decided to begin Badging the Library. It’s baby steps at first, but I am hoping to expand eventually.

You all have seen digital badges–maybe in the form of a community badge displayed in the sidebar of your favorite blog? Or possibly you’ve downloaded AASL’s Rising to the Challenge conference attendance badge? Then there are achievement badges, which are popular in the video game industry. I’ve created skills badges. The purpose of skills badges is to allow students to demonstrate that they have met a learning objective. A great example is Khan Academy, where badges are awarded to display mastery in seven unique skills. My genre reading badges are not at all as elaborate as Khan’s, but I do hope they are just as motivating.

Badging_the_Library__A_PreFlection_-_Google_DriveFor now, I’ve created seven different genre badges for students in grades 2 through 5 (28 badges total). Creating the badges was much easier than anticipated. I looked at various badge designer options and eventually settled on openbadges.me by MyKnowledgeMap (they do have a WordPress plugin as well). To create a badge, you simply select from various choices for each the shape, inner shape, icon, banner, and text. Super easy!

OpenBadges.me_»_Badge_designer_and_Microsoft_Word

To earn a genre reading badge, students have to complete a learning path (see below). The creative product can be anything from a recorded book talk to a trailer to trading cards to a comic strip to mindmaps to animations… Badges will be collected in “My Badge Backpack”, a page on each of my student’s blogfolios.

Reading Pathways

My goal for the badge implementation is to serve as a reading incentive program. Moreover, I want to entice students to explore new genres. In this sense, the learning is entirely student-driven, thereby empowering them to play a stronger role in their own learning.  Students are not required to participate, although I do hope that many will.

So while I am starting small, I see great potential for expansion. For example, one of my curricular areas is digital citizenship. Rather than making badge earning voluntary, it could be a form of assessment–letting students demonstrate what they know–and documenting it for instructional purposes.

Modern Classroom Learning: Creating and Publishing Collaborative eBooks

Photo Skitch Document

Photo Skitch Document-1

My 4th and 5th grade students finished creating ebooks on Fort Caroline, the first French settlement attempt in the New World, and the Lost Colony of Roanoke, respectively. This was a collaborative project with their social studies teacher, Ms. Shelly Zavon. Information sources were web-based, previously gathered, organized, and annotated using Diigo. Each student (5th grade) or student pair (4th grade) contributed a chapter to their class books.

1. Brainstorming. Drawing on their subject knowledge, students began by brainstorming possible chapter topics and then putting them in an order.

Untitled document - Google Drive

2. The Writing Process. Once topics were distributed, students began the pre-writing stage by selecting relevant websites, reading the information, and taking notes to organize their ideas. Students used Google Docs and each shared their documents with the classroom teacher and me. This allowed us to provide immediate feedback. In addition, some students also chose to share their work with friends in the class, seeking their input as well. It was particularly important to provide feedback to students at this pre-writing stage as some found it difficult to narrow information to their particular topic or to simply stay focused on their section of the book to avoid overlapping with another section. And we needed to make sure that facts were accurate. Since the writing process required several stages, including extracting relevant information from the sources, drafting, revising, and editing text, it took multiple sessions.

The Colonists - Google Drive

It was very important to me that students take ownership of this project. So, periodically, we checked our progress as a group. We read through all draft sections and checked facts, suggested word choice changes, provided syntax and grammar corrections, and incorporated transitions between the sections. Reading as a group had the added benefit of providing each student with a better idea on their classmates’ content.

Also, once drafts were complete, I provided each student/student pair with a checklist to ensure writing mechanics were in order. Checklists are a great form of self-assessment for the students that ensure learning and also provide them with a sense of project ownership.

eBook Checklist3. Images. Each section was to include at least one relevant image. This allowed me to teach a mini-lesson Creative Commons images and where and how to find them. For our history topics, we found Wikimedia Commons a great resource.

4. Information Ethics. Creating and publishing an ebook is a great tool to teach students digital citizenship. For this project, I introduced an adapted version of the MLA citation style. Students learned to create proper citations for both text and images. Their sections include in-text citations.

Photo Skitch Document

5. Product. Students used BookCreator app for iPad to create their books. Before importing text and images, students checked each other’s work one last time. For this purpose, I provided them with a Final Check sheet. Fifth grade students also compiled a glossary and editors were asked to identify words/phrases to include in the glossary during the final check.

eBook Final Check - Google Drive

The last step was to decide on a format for the ebooks. Each class brainstormed several options for font style, color and size as well as background color.Each also co-designed the book covers and wrote group reflections. Once their sections were finalized, they sent them to me via email as ibooks. I combined the books into one and added the Table of Contents, Works Cited,  Image Credits, and, in the case of 5th grade’s book, the Glossary pages. The final products are multi-modal, including text, audio, images, and hyperlinks.

6. Assessment. The classroom teacher and I informally assessed both the process and the quality of work through observation and reading of all documents at each drafting stage. If we felt we had to take a step back to bring the group together, we did take the time. For example, after reading all drafts, we realized that there was some repetition of information between different book sections. To ensure the students own this project, we then read all drafts as a class to identify repetitive information. We also continually provided feedback on all written work. Most students received comments/suggestions from both of us.

IMG_0614

photo 3

Reflection

For both my colleague, Shelly, and I this project was meant to not only deepen our students’ understanding of the time periods and historical events they researched by engaging them in the publication of a book, but from the beginning we wanted this to be a student-centered/student-owned project. Creating and publishing ebooks is a very involved process, but it is worth the time spent planning and then guiding the students.

This project promoted the development of multiple literacies. Students learned so many skills, from writing (organization, word choice, sentence fluency, transitions, and mechanics) to editing/proofreading to finding Creative Commons images to citing sources to collaborating to  fluently transition between multiple apps (Google Drive, browser, BookCreator) to publishing. This project incorporated all the hallmarks of modern learning: Creativity, Critical Thinking, Collaboration, and Communication.

Should you decide to hop on the ebook publishing train with your students, remember to be flexible and to allow time. Each stage of the project evolved slowly in accord with their own unique tasks–research, writing, publishing. Slow but deliberate work is key. In retrospect, the project was more about the process than the end product, not only for the teachers but the students as well (read the “Project Reflection” pages in their ebooks).

My students are sharing their work with a global audience and are looking forward to receiving authentic feedback — from you! Please leave them a comment.

Click to download books from the iBooks store:

The Lost Colony of Roanoke:

Fort Caroline: The First French Settlement in the New World

Or view them below:

eBooks: Step-by-Step

Research

Young readers typically focus on fiction books. Since a couple of my first graders were showing interest in nonfiction books, however, I thought it would be a good idea to introduce the whole class to this genre and take the opportunity to also teach them about nonfiction text features and some basic research steps along the way.

To jump start, I randomly distributed a number of nonfiction books (emergent and fluent reader texts, 0.8 to 4.5 AR book levels) on each of our four group tables and asked students to look through the books, noting any differences to fiction books. I then showed them on the projector screen Big Cats (by DK Publishers) from the wegivebooks.org website. We looked through selected pages and identified various text features, including the table of contents, headings, captions, diagram, and labels, discussing the purpose of each.

Since one of my goals was to introduce very basic research skills to this class, we discussed what research is and established that good research starts with a “Wonder” question. We brainstormed a list of questions students may wonder about an animal.

Each student chose a book about an animal on their reading level. They then thought of a question they were wondering about their animal and wrote it in the organizer I had created.

My Animal Report

We spent the next two sessions gathering information from the texts to complete the multi-page organizers. Students drew the animal and labeled it. They drew a picture of its habitat and another of its diet. Then they noted at least four facts about their animal. By far the hardest part was for students to compile a five-word glossary. I decided to model this process by reading a section in a book (projected on the screen) and identifying words that provide information about the animal. This process forced students to read their texts closely to not only identify words (or phrases) but also to figure out their meaning.

photo 2

photo 3-1

I deliberately approached this project step-by-step rather than let each student work at their own speed. So for each section of the organizer, we discussed the type of information to complete and I either modeled or showed examples. Then it was the students’ turn before we moved on to the next part of the organizer. Those students who completed their sections first worked with classmates who benefited from some help or simply encouragement.

photo 1 11-37-41

photo 1

It’s never too early to introduce students to the concept of ethical use of information. So one section of the organizer required the “Source of Information”. We discussed plagiarism and the importance of citing information sources. For our purposes, students noted author names and book titles on their organizers.

Source Info

My 1st graders have experience using various iPad apps, including BookCreator, which they’ve used to create fiction books in the Fall. For this project, I wanted students to again use BookCreator to show their learning. Since it is impossible to create drawings in BookCreator, I decided to introduce the class to ExplainEverything, an app my daughter’s been using for her school work. Its a versatile tool for creating and can also be used for screencasting.

In all, each student created four images: An image for their cover page, a diagram of their animal complete with labels and a picture each of the animal’s habitat and diet. Once finished, the drawings were saved as image files to the iPad’s Camera Roll.

photo 4

photo 3

photo 4

The next step was to import the images into BookCreator app for iPad and transfer the text from the graphic organizer to BookCreator.  We spent several sessions on this. Each time, I emphasized the need to make sure all required elements are included and sentences have proper punctuation and capitalization. Invented spelling was just fine.

photo 1

photo 2-3

Our last session was a “quality check”: going through the book to check for all required elements (cover page, table of contents, wonder question and answer, diet, habitat, diagram with labels, facts, glossary, source, headings) as well as punctuation and capitalization.

photo 2-1 (1)

I was a bit worried that this project would drag on too long for the students to remain engaged, but they displayed an incredible work ethic throughout. They loved to learn about the animals and at all times lots of verbal sharing of information was going on. Also, I do believe that the use of iPads helped to keep them motivated. While I required that students included certain text features and information elements), it also was important for me to allow students to  exhibit their creative sides. So even though I mentioned that dark text on light background is easier on the eyes, some students just “really liked” the very light turquoise colored letters on white background, or the rather swirly fonts. Not easy on my much older eyes, but the products are definitely the students’!  I believe if we want students to take ownership of their learning and products, they must be allowed such simple freedoms.

The outcome of the digital nonfiction books is incredible! I am so impressed with my 1st graders’ skills. I feel very lucky to be working with such a creative group of kids. Each of them worked hard on their projects (a total of 13 45-minute sessions) to produce quality books about their research. Their books speak for themselves!

3rd Grade Global Study Project: Socializing Students to Information Overload

One modern classroom skill is global awareness. Our third graders have been taking advantage of many “Skypportunities” across the globe over the last few months. So when considering a research project for 3rd grade, I thought it only befitting to do country studies with the students.

Introduction

After each student had chosen a country to study, they brainstormed specific information they wanted to learn about the country. We then collected the information in a KW chart.

photo 2-1

photo 3

I then used the KW chart to create a Note Taking Graphic Organizer for the students. I used all of the students’ questions and added three of my own:

  • Identify one way this country is different from ours
  • Identify one way this country is the same as ours
  • Would you like to visit the country some day? Why or why not?

Research

For their information resource, students searched the Kids Infobits (Gale) database. Since they had been introduced to the database earlier, students knew how to navigate this information resource. We spent four 45-minute sessions finding information, reading text for information, and summarizing information using the note taking organizer. I like the Kids InfoBits database as it exposes students to different types of source materials (reference, magazine and newspaper articles, maps, graphs and charts, images). The students quickly figured out that a lot of the information they needed could be found in one of the “Country Overview” reference articles. One student discovered that there are pie charts in the “Graphs and Charts” section showing a country’s religions, which nicely complemented their math lessons where they were learning all about such graphic representations.

photo 2 12-21-29

Product

For a product, students created a Top Five Reasons to Visit/Live report (see “Foundations for Independent Thinking: Look to Bloom and Marzano” by Liz Allen) using Tech4Learning’s Pixie software. The project required not only a transfer of information collected on the organizer to Pixie, but students were challenged to provide detail and/or comparisons in their statements. For example, rather than simply writing: “They have lots of different religions”, a more specific statement would be, “Judaism is the major religion in Israel.” Or, rather than stating that “They have interesting places to visit”, “In China, you can visit the Great Wall, which is so big that you can see it from space.”

Pixie - nahila.venezuela

Pixie - Julia.China

After all their hard work, students shared their products with the class. There were lots of questions for each presenter from curious classmates!

photo 2

Negotiating Information Overload

To some degree, this was very much a student-driven project, as students chose a country to research and generated research questions about the country of their choice. The level of engagement was high throughout the project. Students really enjoyed finding out about unique animals and special foods and loved to share the information with their classmates as they were discovering new information during the research process.

Still, reading text for information clearly is challenging for all students. And even though we used a kid-friendly database for our information resource, not all information was easily understood. Students were challenged to learn new vocabulary (e.g., population, climate, transportation, reference source) and needed many reminders to not simply scan an article but to read it in its entirety. I limited the research stage to four sessions. Some students had already completed their organizers after three sessions, others were not finished after four–but all students had enough information to create their products.

Creating the Top Five Reasons report again challenged them to think critically by using the information they had gathered, evaluate it, and then apply it in a new way. Initially, we required the Top Ten reasons, but found that most students simply listed very basic information (as mentioned above). So we changed the requirement to the Top Five insisting on quality statements: Convince me to want to visit or even live in the country.

I think students found this last step so challenging because while they had gathered a lot of information, they often did not read texts in their entirety but rather skimmed or scanned them for the information sought and then moved on. I’ve observed this research behavior in many of my older students as well: Skim or scan the first few results of a Web search, then enter a new search or simply give up.

Not reading closely also caused some students to provide incorrect information. For example, one student claimed that the South Korean currency is the “Korean dollar” and another student claimed that Boxing Day is celebrated by Kangaroos boxing each other! While very imaginative, the information obviously is incorrect.

If I were to do this project again, I would begin by modeling the information gathering process with a focus on how to closely read and extract information.  Also, I would focus the information sought on more unique facts and encourage students not to get overwhelmed.  So rather than determining the political system or size of the country (neither of which really tell the students much anyway), focus on customs and culture. Some such questions were included in the graphic organizer, but they were not the focus of the research. I believe fewer but more in-depth questions would have forced the students to read text more closely and made it less challenging to come up with those reasons that can convince me to live or move to another country!

Introducing 2nd Grade Students to Research

To celebrate Black History Month our 2nd grade teacher asked me to collaborate on a student research project. Her general goal was for students to each learn about one famous African American. For me, this was an opportunity to bolster students’ information literacy skills by engaging them in some heavy duty research.

Pre-Activities

The first step was to assure students were able to define the biography genre. I asked them to explore a number of different biographies and then we collaboratively identified the information one can find in them. Next I introduced the students to our research tool, the Kids InfoBits (Gale) online database, which offers student-friendly articles on a variety of subjects. Inspired by a “scavenger hunt” created by librarians at Round Rock Independent School District, I created an adapted version for my students to let them explore Kids InfoBits.

KidsInfoBits Scavenger Hunt

Research

To guide their research, students used a simple graphic organizer (see timeforkids.com) requiring the completion of four major areas of information. Additionally, if students could find one, they were to add a quote by the famous person they were researching.

Biography Organizer

It turned out that some students felt overwhelmed by the amount of information available through the database and/or found the online articles too difficult to comprehend. So the classroom teacher supplied lower reading level print biographies to those students. Since the print text also offered many pictures, students were able to extract information more easily.

photo 2

Finally, I always want my students to self-check their work before we move on to the next step. So once the research process was completed, students used a Biography Check form I created using the Comic Life app for iPad.

Biography Check

Product Creation

My colleague and our school’s Director of Teaching & Learning, Andrea Hernandez, suggested students create an Associative Letter Report (see “Foundations for Independent Thinking: Look to Bloom and Marzano” by Liz Allen) as their cunulative project.

Similar to an ABC-style book, an associative letter report asks students to take what they know about a topic and organize the information around a specific letter. For example, a student assigned the letter “B” and Rosa Parks might write “B is for Rosa Parks because she was brave when she would not budge from her seat.”

So before creating the reports, students had to think of nouns and adjectives to describe their person–and to ensure all those nouns and adjectives begin with the same letter. This was not an easy task and involved some problem solving and thinking outside the box. We did not require a minimum number of words, but left it up to each student’s ability. Some of them thought of six words, others just two.

Pixie - Nadav1

Students used the Pixie2 software (Tech4Learning) to produce their reports. We gave a few guidelines, including font must be black for readability, titles should be large enough to read, one image per page. As before, once the reports were completed, I asked students to self-check their work by providing them with another checklist (also created with the Comic Life app for iPad).

Bio Project Check


Student products are presented in the following videos:

Part 1

Part 2

Presentations

Students presented their projects to the class. We video recorded each presentation. As a next step, the classroom teacher will upload the report artifacts and recorded presentations to each student’s blogfolio. To conclude the project, students will reflect on their work and presentations.

photo 2
Reflection

My goals for this project were for students to conduct research, read for information, apply critical thinking skills to organize the information found, and create a final product using the information. It was an ambitious project, especially since the students had no prior research experience. But the students learned by doing. And while the research process was at times frustrating for some, I think all students improved their stamina to stay actively engaged in more in-depth projects.

The Pixie project was a great tool for differentiation. As their products show, some students created up to six separate slides with full paragraphs of text, while others created only one or two slides in the same amount of time with only a sentence or two. In this group of 19 students, there is clearly a range of developmental and academic ability represented and the project served this range well.

It definitely helped that the classroom teacher agreed to add an additional hour per week to our schedule. Initially, we met only once weekly — not at all enough time to allow students to “connect” to the project. In the future, I would definitely work out a schedule with the classroom teacher that involves the children multiple times weekly.

At times, a visitor to the classroom may have considered the lessons chaotic, but if he had listened closely, he would have heard students talk excitedly about “their famous person” to their desk neighbor, shared an image with another student, or helped a classmate in the use of Pixie. Students were focused on their work and engaged in learning throughout the project.

A Big Red Flag: Citations as a Source of Concern

My 4th and 5th grade students are currently writing ebooks: 4th grade on the short-lived local French colony, Fort Caroline, and 5th grade on the Lost Colony of Roanoke. The ebooks are culminating projects based on a previous unit I did with both classes using Diigo to organize information.

We began our ebook unit by looking at several excellent student-produced, non-fiction examples I had downloaded from the iTunes store. The examples included not only text, but also student-produced images as well as audio and video recordings.The books were creative and informational and served to motivate and inspire my two classes as they have begun the process of creating their own ebooks.

Standards_cover_200pxAs beautiful as the books are, however, not one cited any information sources. As a librarian, this is a big red flag! My practice as a school librarian is guided by the common beliefs expressed in the American Association of School Librarians’ Standards for the 21st-Century Learner (2009), one of which is:

“Learners…share knowledge and participate ethically and productively as members of our democratic society.”

In our copy-and-paste information world, how do we teach our students to use information both correctly and ethically? Most of my career, I have worked in higher education.  I have spent many hours teaching college students the various citation style formats. Even for these students, it is not an easy, nor enjoyable, task. But, as I tell my elementary students, you may not use someone else’s idea or work product and publish it as your own. It is as simple as that. Also, citations allow readers to not only access the original source, but also potentially find more information.

So I’ve spent the last two sessions with my 4th/5th graders discussing the need for crediting sources and creating citations. For this age group, I’ve decided to use a simplified Modern Language Association (MLA) format, consisting of author, web page and website titles, publication format, and date of access. (For this project, student research consists entirely of web pages.)

Reflection_ Citations_ A Source of Concern - Google Drive

As for understanding the need to cite sources, my students are savvy, already getting lots of practice as regular student bloggers. But creating formal citations is so much harder. Students have to understand not only the various elements of a citation, but also where to locate those pieces of information and then putting it all into the correct format. It is a tedious and time-consuming task, but we are getting there.

The process has been a learning challenge for my young student authors–and  their librarian alike. But as the AASL points out, source citation is a matter of ethics. I cannot wait to upload our ebooks to the iTunes store. But first, we have to master the specifics of full and proper citation! Those ebooks will be examples of not only “sharing knowledge” but also “participating ethically and productively as members of our democratic society.”

Resources
Copyright and Fair Use Guidelines for Teachers (Edudemic.com)

EasyBib: Free Bibliography and Citation Maker (Imagine Easy Solutions, LLC)

MLA Style (Purdue Online Writing Lab)

A Lesson in Social Bookmarking in the Classroom

4th Grade Collaboration

Introduction
Diigo (Digest of Internet Information, Groups and Other Stuff) is a free social bookmarking tool that allows its users to store, manage and share Internet resources. Users can bookmark, highlight, tag, and annotate selected web pages while reading online. As they are stored in the cloud, bookmarks can be retrieved from any computer anytime and anyplace. Resources may be shared with other users.

As a social bookmarking tool, Diigo clearly has the potential to make reading and research a social activity in the classroom. In collaboration with our social studies teacher, I’ve used Diigo with our 4th and 5th grade students: 4th graders were researching the pre-colonial French settlement Fort Caroline (Jacksonville, Florida) and 5th graders were gathering information on the Lost Colony of Roanoke (North Carolina). Using the researched information, students are currently in the process of creating eBooks about their topics.
Objectives for students were:

  • to research and become familiar with informational texts about their respective topics
  • to use Diigo to collect and organize their new information
  • to apply various Diigo features, including highlighting and annotating of web pages or text passages and  tagging of web pages for organization and classification

Setup

With an educator account, I created a Diigo Group for each class. Privacy settings of educator accounts are pre-set, limiting communication to assigned teachers and their students. Also, by default, student profiles are private. Each student was provided with their login information and created an avatar for their profiles using one of the following websites:

Diigo Group

In each classroom, we then created tag dictionaries to categorize websites, ensuring consistency of keyword tags. We brainstormed tags to include in each dictionary, for example “Ft. Caroline” instead of “Fort Caroline”, or “Native Americans” instead of “indians” or “natives”.

Tag DictionarySteps

Since our students already had an introduction to Web search techniques in an earlier unit, I began by focusing on annotations. The great benefit of Diigo’s annotation tool (virtual “sticky notes”) is that it allows students to summarize a website’s important concepts and main points. Annotations encourage student interaction and engagement and are central to collaborative research. The students explored: What are the elements of a quality annotation? We brainstormed and I used the definitions students gathered to create a reference sheet:

Quality Annotations

While the process may seem straightforward, students struggled with the concept of a quality annotation. I’ve blogged about this issue here.

Evaluation

Research is not simply about finding information, but also evaluating and synthesizing the information found. The skills necessary to evaluate and synthesize require students to read text closely and paraphrase the useful information, respectively. These are critical, transferable skills, but working with elementary students I have learned that these are often the most difficult for the students to grasp.  Thankfully, we were not under any time constraints, giving us time to model and review when needed.

For my students, Diigo is a powerful collaborative learning tool in the classroom. Students interacted with informational text and with one another and were motivated to stay on task. They read, highlighted, tagged, and annotated relevant websites for their research projects.

Best content in 4MJGDS | Diigo - Groups

The annotation process, however, was harder to learn for my 4th than my 5th graders. Fourth graders also spent a lot more time looking for relevant images than focusing on reading text. Reasons may be maturity, existing skills, class size (20 vs. 11 students), time of day (Friday afternoon classes for 4th grade), or a combination.

Overall, this was a great collaborative project. Diigo allowed my students to not only manage information, but also to hone their communication and collaboration skills — all vital to success in school and their overall future. I would like to repeat this lesson, possibly on a grander scale: Not only with a classroom at another school, but perhaps “classmates” in another country.

Quality vs Safety

I always strive for quality work. Producing quality work, however, involves stepping out of my safety zone and challenging myself. But it also involves time. In the case of research, the process of producing quality work can be quite laborious.

My 4th and 5th grade students are currently researching Fort Caroline (the first and rather short-lived French fort in the U.S. located here in Jacksonville, Florida) and the Lost Colony of Roanoke, respectively. To organize our research, we are using Diigo, a powerful social bookmarking tool. I’ve created a Diigo Group for each class via an educator’s account. Within each group, students are collaboratively collecting websites on the topics and annotating them using Diigo’s highlighting and sticky note tools.

So while the process seems pretty straightforward, it is actually quite messy. I’ve now spent two 50-minute sessions with each class searching, collecting, and annotating. Students are finding that they have to closely read each web page, evaluate it for its merit, and then offer a quality annotation. This last step is hard.

Before beginning the actual search process, we came up with a definition of Quality Annotations. I’ve compiled it as a quick reference sheet and then added annotation starters.

Quality Annotations

With each class, we’ve looked at the web pages collected and the annotations added. Students clearly love Diigo’s highlighting feature and are good about not simply highlighting large sections of text. But they do need to work on their annotations! Too many of them simply say “informative” or “descriptive”.

Diigo Screenshot

Diigo Screenshot 2

While the above are not representative of quality work, students are capable as shown in the following examples:

Diigo Screenshot 3

Diigo Screenshot 4

So the big question is: How do you ensure quality work? In this case, how do I get my students to read text or examine an image closely, evaluate the information provided, and then offer a quality annotation that contributes to the class collaborative research?

My plan is to begin our next session with something we should have done before starting our research: Brainstorming research questions. What do we want to know? Then, each student will edit their “My Library” (Diigo terminology for bookmarked web pages etc.) and evaluate their work according to the following criteria:

  • Does the web page / image provide important information that answers my research question?
  • Did I highlight the important information?
  • Did I add a quality annotation?
  • Are all my research questions answered, or do I need to search for more information?